They call it a jelly roll quilt. Not because it's edible, or made from anything remotely edible, but because pre-cut strips of coordinated fabric are sold rolled up like this, and they look a bit like a jelly roll.

Now, I'm not much for buying things in 'kits'. Mostly because I'm so cheap I squeak when I walk, but also because it seems to me that a big part of the creative process is 'pulling it all together'. I don't want someone else telling me what my work should look like... it's just not.... well, creative.
But I did need to make a quilt for one of the rooms in my future B&B, and I didn't want to spend forever on it. It needed to nice, but not a work of art. It needed to use materials I have, no purchases allowed. I do have a bit of fabric stashed away from a former life.... well, actually, a lot of fabric..... ok, let's be honest - quite a lot. So I surfed a bit for ideas, and came across the jelly roll. I got out my calculator, and figured out how much 'strippage' would be needed for the bed in question, and went looking for fabric.
It seems kind of wasteful to me (there's that cheap squeakiness again) to cut perfectly good yardage into pieces, then sew them all together again to make more yardage. I think a quilt should be made, as much as possible, from bits and pieces, ends left over from other projects, recycled, salvaged, not very useful bits. My quilt would be just that. The trendy jelly roll is made up of strips of new fabric, all the same weave and weight, cut across the grain, so all strips are the same length. Mine ranged from a few inches to 3 or 4 feel long, from cotton flannel to cotton velvet, satin to tweed, stripes and florals and plaids. I sorted through my bits and decided on a masculine-ish somewhat muted palette, with a few coordinating florals to soften the look. Some of the reds and whites were a bit harsh for what I wanted, so I separated them, boiled up a box of orange pekoe teabags and threw the whole mess in the washing machine. Then filled the washer up with hot water, gave it a good stir and added the fabric. I twisted the teabags into a short length of white-on-white cotton to get a darker, blotchy pattern behind the printed one, and threw that in too, The result was gentler reds and 'antique' whites. I was especially pleased with the blotchy one.
Then I dusted off my rotary cutter and cutting mat, and spent a week one day, cutting strips. When I'd cut it all up, I gave it a good stir to mix up the colors, then I began laying one atop the other, in no particular order, the only criteria being that no two of the same fabric should be together, until I had enough to make a roll. This step wasn't crucial, but it tidied up my workspace, and made sure the colors were well mixed.

Then I started to sew. One strip after the other, end for end, for ever and ever amen, until it was one continuous strip.

Here's where it gets groovy. When you have reached the end of one long strip about a brazillian miles long (or 1.6 brazillion kilometers or something like that, if you're in Canada) you find the other end. If you're cleverer than me, you thought of this when you started and tied the beginning end to something so it couldn't get away. You then sew them together, lengthwise, to get a new strip twice as wide, and only a half brazillion miles long (.8 brazillion in Canada) When you get close to the end, you'll be reminded that it's not 2 strips, but one, and you'll cut the strip in order for it all to lay flat, and finish sewing.

Join the end of this wider strip with its beginning, and sew again, to make it 4 strips wide, cutting at the far end again, to lay it flat and finish the seam.

Then do it all again, to make it 8 strips wide, again to make it 16 wide,

and one more time for a finished product, in this case, of 32 strips wide.

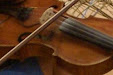
And this is what it looks like so far, sprawled on my couch taking a nap.
If you're cleverer than me, you'll have a quilt top approximately the size you'd originally calculated for. If you're no more clever than me, you won't. If you're LUCKY, as I was, you'll have a finished product that is actually twice as long as desired, and you now have enough for two quilts.
After hours of staring blearily at the ragged, fraying underside of the thing, I never like the look of it at this stage. This is when I wonder if it's worth all the trouble of putting the batting and underside on. Happily, the finished product almost always pleases me. Not that it can't be done, but it takes a special kind of gift to make a seriously ugly quilt.

6 comments:
Modern quilting is an expensive enterprise for sure! And I agree, kind of crazy to cut up perfectly good fabric to just sew it back up into another piece of fabric.
What you did there ... looks like a lot of work. Am looking forward to a view of the finished product.
I haven't quilted in a number of years now. Shame on me because I bought a machine and cabinet etc. What a waste. But maybe one day I'll get back at it. I have projects ... unfinished projects that need doing.
Cicero - this is my first effort for many years as well. Prompted by necessity, and, yes, a lot of work, but a good reminder of how much I enjoy the work. I'll be plugging away at it; will post a pic of the final product.
The one thing that always got me about quilt making was dealing with the blisters I got from cutting small pieces of fabric into ever tinier pieces. I guess I didn't always have the best scissors but I did have a good strong wrist. It's funny when I compare my two forearms and see the right one is definitely wider than the left - even drawing a lot takes strength.
I really like the way your quilt(s) is going - not fancy, as you said, but very comfortable and attractive. I'll also look forward to seeing the end result.
i like your quilt ... i was looking at it and wondering what would happen if you took the whole bunch of them and tossed them in for a tea bath! i love doing that to my clothes, fabric, towels, the dog...
i remember making a log cabin quilt sort of like this. now i can't remember exactly what i did to get the square, maybe it was just strips and cutting around that center square. anyway love yours so far and think you are genius. i know i didn't do it quite like this and this is much faster than going around and around a 3" square but i was very crazy at the time.
what is the batting you are planning? you aren't quilting this i assume?
your b&b is going to be fabulous. xxx
Linda- I've thought of a lot of ways to use a tea bath, but I have to admit, it never occurred to me to try the dog - though a friend once accidentally dyed her dog purple (he jumped in a tub of dye that was on the floor) :0)
I'll use a natural cotton batt I have in my stash, and probably just channel quilt along the lengthwise seams. The length of flannelette awaiting its new life as quilt backing is much too new looking and bright, so it looks like I'll be doing another tea dye batch. The dog may be at risk. ;0)
Susan-I tried the zillions of small bits too. Huge work! But my eldest kids spent their formative years under those quilts, and I don't recall any major injuries from pins overlooked. Then I discovered 'quick quilting', which minimizes that but works best with yardage..... Sigh.
Yes, I think our foremothers could have trounced us in arm wrestling.... What with kneading bread and wringing out clothes and hauling water and milking cows and chopping firewood and..... The list is nearly endless.
Post a Comment